Master Your Epson Printer: Quick Learning Guide
Discover how to get the most out of your Epson printer with our personalized, step-by-step guide tailored just for you. From effortless setup to troubleshooting tips, we’ve got you covered. Whether you’re printing at home or for your small business, this guide is designed to make printing easier and more efficient.
Choosing the Right Canon Printer for Your Needs
Selecting the right Epson printer can be overwhelming, especially with the wide variety of models available, each designed for specific uses. Whether you need a reliable printer for home use, a high-performance device for your office, or a professional-grade photo printer, Epson has something for everyone. To help you make the best choice, this guide breaks down the key features of various Epson printer series, so you can find the model that perfectly fits your printing needs.
We’ll explore Epson's most popular printer lines, including EcoTank, WorkForce, Expression, and SureColor, and provide recommendations for different scenarios—ranging from home offices to professional photo printing.
1. Epson EcoTank Printers: Best for High-Volume Printing
Epson’s EcoTank series is famous for its innovative ink tank system, which replaces traditional cartridges with refillable ink tanks. This allows you to print thousands of pages before needing a refill, making it a cost-effective option for high-volume printing.
Who Should Choose an EcoTank Printer?
- High-Volume Users: If you print large quantities of documents regularly—whether at home or in a small business—the EcoTank’s low cost-per-page will save you money in the long run.
- Eco-Conscious Users: EcoTank printers are environmentally friendly due to the reduction in cartridge waste, making them a good choice for those looking to minimize their environmental footprint.
Key Features:
- Refillable Ink Tanks: Large ink tanks that hold enough ink to print thousands of pages without needing frequent refills.
- Low Running Costs: The initial investment may be higher than traditional cartridge printers, but the cost of ink is much lower, making it an affordable option over time.
- Versatile Options: EcoTank printers come in a variety of models, some focusing on text-heavy document printing and others designed for color prints and photos.
Recommended Models:
- Epson EcoTank ET-3760: Ideal for home offices, this all-in-one printer offers fast, high-quality printing, scanning, and copying. With its wireless connectivity, it’s a versatile choice for families and small businesses.
- Epson EcoTank ET-15000: A great option for businesses that need to print large-format documents up to 13 x 19 inches. It also features an automatic document feeder for scanning and copying multiple pages quickly.
2. Epson WorkForce Printers: Best for Business and Office Use
The Epson WorkForce series is built for small and medium-sized businesses that require fast, reliable, and high-quality document printing. These printers are known for their speed and efficiency, making them ideal for handling high-demand office environments.
Who Should Choose a WorkForce Printer?
- Small to Medium-Sized Businesses: WorkForce printers are designed to handle the high-volume needs of a busy office, from reports and contracts to marketing materials.
- Remote Workers and Home Offices: If you work from home but need office-grade performance, WorkForce models provide fast printing speeds and professional-quality output.
Key Features:
- Fast Print Speeds: WorkForce printers are known for their ability to churn out pages quickly, making them perfect for fast-paced office environments.
- Durable and Reliable: Built to last, WorkForce printers are designed to handle large print jobs without frequent maintenance.
- Advanced Connectivity: Many WorkForce models offer wireless printing, Ethernet connectivity, and mobile printing options via apps like Epson iPrint, Apple AirPrint, and Google Cloud Print.
Recommended Models:
- Epson WorkForce Pro WF-4830: This all-in-one printer is designed for high-volume printing, with fast duplex (two-sided) printing and scanning capabilities, making it ideal for businesses that need efficiency and quality.
- Epson WorkForce WF-7840: A wide-format printer that’s perfect for businesses needing to print large documents, such as spreadsheets, blueprints, and posters, up to 13 x 19 inches.
3. Epson Expression Printers: Best for Home Use and Everyday Printing
The Epson Expression series is geared toward home users who need an affordable, easy-to-use printer for everyday tasks. These printers provide a great balance of quality and convenience, making them suitable for printing photos, school assignments, and personal documents.
Who Should Choose an Expression Printer?
- Home Users and Families: If you need a reliable printer for occasional document printing, photos, and creative projects, the Expression series is perfect for family use.
- Casual Photo Printers: The Expression line offers good photo quality at an affordable price, making it a great choice for families who want to print their own photos at home.
Key Features:
- Compact Design: Expression printers are compact and fit easily into any home office or living space.
- Affordable Printing: These printers are budget-friendly, both in terms of upfront cost and running expenses, making them ideal for casual home use.
- Photo Printing: Some Expression models are designed to deliver high-quality photos with vibrant colors and crisp detail, perfect for family photo albums or creative projects.
Recommended Models:
- Epson Expression Premium XP-7100: This all-in-one printer is perfect for families, offering excellent photo quality, easy-to-use controls, and wireless printing. It’s also equipped with a duplex document feeder for scanning and copying multiple pages at once.
- Epson Expression Home XP-4100: A compact and affordable option, this model is great for everyday printing, scanning, and copying at home. It’s wireless, so you can print from any device, making it ideal for families with multiple users.
4. Epson SureColor Printers: Best for Professional Photo and Graphic Printing
The Epson SureColor series is designed for photographers, artists, and graphic designers who need professional-grade prints. These printers deliver stunning color accuracy, sharpness, and detail, making them the go-to choice for high-quality photo printing, fine art, and large-format posters.
Who Should Choose a SureColor Printer?
- Professional Photographers and Graphic Designers: If you require exceptional color accuracy and detail for prints that will be displayed, sold, or presented, the SureColor series is your best option.
- Fine Art Printers: Artists who need large-format prints with precise color and detail will find the SureColor series ideal for their needs.
Key Features:
- Ultra-High Print Quality: SureColor printers use advanced printhead technology and a wide color gamut to deliver prints with extraordinary detail and color accuracy.
- Wide-Format Printing: Many models can print up to 44 inches wide, making them suitable for posters, fine art, and professional photo prints.
- Pigment Inks: SureColor printers often use pigment-based inks, which produce long-lasting prints that resist fading over time, ideal for archival quality prints.
Recommended Models:
- Epson SureColor P900: A top-tier choice for professional photographers and artists, the P900 offers outstanding print quality with a 10-color UltraChrome HD ink set, capable of producing rich, vibrant colors and deep blacks. It supports wide-format printing up to 17 inches.
- Epson SureColor P600: A slightly smaller model, the P600 still delivers professional-grade photo and fine art prints with incredible color accuracy and depth, supporting prints up to 13 x 19 inches.
5. Epson Artisan Printers: Best for Creative and Craft Projects
The Epson Artisan series, though no longer actively produced, remains a great option for those who want high-quality photo printing combined with versatility for craft projects. These printers offer superior photo printing with a focus on creative applications, making them perfect for artists, crafters, and scrapbook enthusiasts.
Who Should Choose an Artisan Printer?
- Creative Hobbyists: Ideal for those who love crafting, DIY projects, and printing high-quality photos.
- Artists and Designers: If you’re working on creative projects that require superior print quality, color accuracy, and versatility, an Artisan printer can meet your needs.
Key Features:
- Advanced Photo Printing: Artisan printers are known for their outstanding photo quality, thanks to multiple ink cartridges and high-resolution print settings.
- Creative Applications: These printers are ideal for printing photos, art, scrapbooking projects, and other creative endeavors.
- Versatility: Artisan models offer a range of media support, including specialty papers, photo paper, and cardstock.
Recommended Models:
- Epson Artisan 1430: Although discontinued, the Artisan 1430 is still sought after for its wide-format photo printing capabilities and high-quality prints, making it ideal for artists and photographers.
Conclusion: Finding the Right Epson Printer for Your Needs
Choosing the right Epson printer depends on your specific needs, whether you’re printing photos, documents, or artwork. EcoTank models are great for high-volume printing with minimal ink costs, while WorkForce printers are perfect for fast-paced office environments. If you're a casual home user, the Expression series offers affordability and convenience, and for professionals in photography or graphic design, the SureColor series delivers unmatched print quality and precision.
No matter which Epson printer you choose, you can expect reliable performance, advanced features, and exceptional print quality tailored to your unique needs. Happy printing!
Epson Printer Setup & Installation
Setting up your new Epson printer is a simple and straightforward process, whether you’re connecting it to your computer via USB, Wi-Fi, or Ethernet. This guide will take you through all the necessary steps to set up your Epson printer correctly, install the required drivers, and ensure it's ready for optimal performance.
Whether you own an Epson EcoTank, WorkForce, or Expression series printer, this guide will cover the essentials for getting your printer up and running.
Step 1: Unboxing and Preparing Your Epson Printer
Before starting the setup process, ensure that all components are in place.
- Unbox the Printer: Remove the printer from its box and take off all protective packaging materials (tape, foam inserts, etc.).
- Install Components:
- For Inkjet Printers (EcoTank, Expression): Install the ink cartridges or fill the ink tanks (for EcoTank models) according to the manufacturer’s instructions.
- For Laser Printers (WorkForce): Install the toner cartridges or imaging unit as per the manual.
- Load Paper: Load the paper tray with plain paper. Make sure to align the paper stack properly and adjust the paper guides to prevent jams or misfeeds.
Step 2: Connecting the Epson Printer to Power
After you’ve set up the hardware, you’ll need to power on the printer.
- Connect the Printer to a Power Source: Plug in the power cable and turn on the printer using the power button.
- Wait for Initial Setup: The printer may perform an initial setup process. Let the printer complete this process, which may take a few minutes.
Step 3: Connecting Your Epson Printer to a Computer or Network
Now that your printer is powered on, you’ll need to connect it to your computer or network. Depending on your preference, you can connect via Wi-Fi, USB, or Ethernet.
Option 1: Wi-Fi Setup
Wireless printing allows you to print from any device connected to your network, including laptops, desktops, and smartphones.
- Access the Wi-Fi Setup Menu: On your Epson printer’s control panel, navigate to the Settings or Network menu, and select Wi-Fi Setup. You may also see options like Wireless LAN Setup or Network Settings depending on the model.
- Select Your Wi-Fi Network: The printer will search for available Wi-Fi networks. Select your network from the list and enter the password using the on-screen keypad.
- Confirm the Connection: Once connected, your printer should display a confirmation message, and the wireless indicator light will remain solid. If the connection fails, ensure that you’ve entered the correct Wi-Fi password and try again.
- Install the Printer Drivers:
- Go to the Epson Support website and enter your printer model.
- Download the latest drivers for your printer and operating system.
- Follow the on-screen instructions to install the drivers and configure your printer for wireless use.
Option 2: USB Setup
If you prefer a direct connection between your Epson printer and computer, using a USB cable is a reliable option.
- Connect the USB Cable: Plug one end of the USB cable into the printer and the other into your computer.
- Turn On the Printer: Ensure the printer is powered on.
- Install the Printer Drivers:
- Visit the Epson Support website and search for your printer model.
- Download the appropriate drivers for your operating system (Windows or macOS).
- The setup wizard will automatically detect the USB connection and complete the installation process.
- Print a Test Page: After the drivers are installed, try printing a test page to ensure everything is working correctly.
Option 3: Ethernet Setup (For Network Printing)
For office environments where a wired network connection is required, you can connect your Epson printer via Ethernet.
- Connect the Ethernet Cable: Plug one end of the Ethernet cable into the printer’s Ethernet port and the other end into your router or network hub.
- Access Network Settings: On the printer’s control panel, go to Settings > Network Settings > Wired LAN Setup. Confirm the Ethernet connection.
- Install the Printer Drivers:
- As with the other methods, visit the Epson Support website to download the latest drivers.
- During installation, the setup wizard will detect the printer on the network and finalize the installation.
- Print a Test Page: Once installed, print a test page to confirm that the printer is connected to the network and functioning properly.
Step 4: Setting Up Mobile Printing (AirPrint, Google Cloud Print, Epson iPrint App)
Epson printers support a variety of mobile printing options, making it easy to print directly from your smartphone or tablet.
AirPrint Setup (for iOS Devices):
If you’re using an iPhone or iPad, AirPrint allows you to print wirelessly without the need for additional drivers.
- Ensure Your Devices Are on the Same Wi-Fi Network: Both your iOS device and the Epson printer must be connected to the same network.
- Open the Document or Photo: On your iPhone or iPad, open the file you want to print (document, image, webpage, etc.).
- Use the Share Icon: Tap the Share icon (a square with an arrow) and select Print.
- Select Your Printer: Choose your Epson printer from the list of available devices, adjust the print settings (number of copies, paper size), and tap Print.
Google Cloud Print Setup (for Android Devices):
Google Cloud Print allows Android users to send print jobs from their devices to any cloud-connected printer.
- Ensure Both Devices Are on the Same Network: Your Epson printer and Android device must be connected to the same Wi-Fi network.
- Open the File to Print: On your Android device, open the file you wish to print.
- Select the Print Option: Choose Print from the app’s options, then select Google Cloud Print and your Epson printer.
- Confirm the Print Job: Adjust the print settings as needed and confirm the print job.
Epson iPrint App:
The Epson iPrint app is available for both iOS and Android, allowing you to print documents, photos, and web pages directly from your smartphone or tablet.
- Download the Epson iPrint App: Visit the App Store (for iOS) or Google Play (for Android) and download the Epson iPrint app.
- Connect to Your Printer: Open the app and connect it to your Epson printer via Wi-Fi.
- Print from Your Mobile Device: Select the document, photo, or webpage you want to print and adjust print settings if necessary.
Step 5: Troubleshooting Common Setup Issues
If you encounter any problems during the setup process, here are some troubleshooting tips to help you resolve them:
Wi-Fi Connection Issues:
- Solution: Ensure that your printer and computer are connected to the same Wi-Fi network. Move the printer closer to the router if the signal is weak, and double-check the Wi-Fi password.
USB Setup Problems:
- Solution: If your computer doesn’t recognize the printer, try using a different USB port or cable. Ensure that you’ve downloaded the correct drivers for your operating system.
Ethernet Setup Issues:
- Solution: Make sure the Ethernet cable is securely connected to both the printer and the router. Restart the router and printer to refresh the connection.
Mobile Printing Issues:
- Solution: Confirm that both your mobile device and printer are on the same network. Restart the Epson iPrint app or your phone if the printer isn’t detected.
Conclusion: Getting the Most from Your Epson Printer Setup
Setting up your Epson printer is a hassle-free process when you follow these steps. Whether you're connecting via Wi-Fi, USB, or Ethernet, Epson makes it easy to get your printer up and running. With mobile printing options like AirPrint, Google Cloud Print, and the Epson iPrint app, you can print directly from your smartphone or tablet with minimal effort.
Once your Epson printer is set up, make sure to install the latest drivers and firmware updates to ensure optimal performance. If any setup issues arise, refer to the troubleshooting tips in this guide, and you’ll be printing with ease in no time. Happy printing!
Troubleshooting Common Epson Printer Issues
Epson printers are reliable and known for their quality, but like any piece of technology, they can sometimes run into problems. Whether you're facing issues with print quality, connectivity, or paper jams, many common problems can be easily resolved with a few troubleshooting steps. This guide covers some of the most frequent Epson printer issues and provides practical solutions to help you get your printer back up and running smoothly.
1. Resolving Paper Jams
Paper jams are a common problem in any printer, and Epson models are no exception. Paper jams can occur due to misaligned paper, overloaded trays, or using the wrong paper type.
How to Fix a Paper Jam:
- Turn Off the Printer: Power off your Epson printer to avoid damaging the internal mechanisms.
- Open the Printer’s Access Doors: Open the front cover, rear cover, or paper tray to locate the jammed paper.
- Gently Remove the Jammed Paper: Carefully pull the paper in the direction of the paper feed. Avoid pulling too hard, as this may tear the paper and leave pieces inside the printer.
- Check for Remaining Debris: Inspect the printer for any small pieces of paper that may still be stuck inside. Even small fragments can cause future jams.
- Reload Paper Properly: Reload the paper tray, ensuring that the paper stack is properly aligned and not overfilled. Adjust the paper guides snugly against the paper without being too tight.
Pro Tip: Avoid using damaged, wrinkled, or incompatible paper types, as these are common causes of paper jams.
2. Fixing the "Printer Offline" Error
One of the most frustrating issues users encounter is the “Printer Offline” error, where the computer can’t communicate with the printer. This can be caused by connectivity issues or incorrect printer settings.
How to Fix a "Printer Offline" Error:
- Check the Printer’s Status: Ensure that the printer is turned on and that there are no error messages or blinking lights on the control panel.
- Verify the Network Connection:
- Wi-Fi Printers: Ensure that both your printer and computer are connected to the same Wi-Fi network. If the Wi-Fi indicator on the printer is blinking, it may indicate a connection problem. Reconnect the printer to the Wi-Fi using the Wi-Fi Setup option in the printer's settings menu.
- USB Printers: Ensure the USB cable is securely connected to both the printer and the computer. Try using a different USB port if necessary.
- Ethernet Printers: Check that the Ethernet cable is properly connected to both the printer and the router.
- Restart the Printer and Computer: Sometimes simply restarting both the printer and the computer can resolve the issue.
- Update Printer Status:
- On Windows: Go to Control Panel > Devices and Printers. Right-click on your Epson printer, select See what’s printing, and ensure Use Printer Offline is unchecked.
- On macOS: Go to System Preferences > Printers & Scanners, select your Epson printer, and click Open Print Queue. If the printer is paused or offline, click Resume.
- Reinstall Printer Drivers: If the problem persists, reinstall the printer drivers by downloading the latest version from the Epson Support website.
Pro Tip: Keep your printer’s firmware and drivers up to date to avoid compatibility issues and offline errors.
3. Dealing with Print Quality Issues
Poor print quality, such as streaks, faded prints, or incorrect colors, can be caused by several factors including low ink levels, clogged printheads, or improper settings.
How to Fix Print Quality Issues:
- Check Ink Levels: Low ink or toner can cause faded or streaky prints. Use the printer’s control panel or the Epson Status Monitor to check ink levels and replace cartridges if necessary.
- Run a Printhead Cleaning Cycle:
- On the printer’s control panel, navigate to Settings > Maintenance > Clean Printhead.
- Alternatively, use the Epson Printer Utility on your computer to run the cleaning cycle.
- This will clear any clogs in the nozzles and improve print quality.
- Print a Nozzle Check Pattern: After cleaning the printhead, run a Nozzle Check to ensure that all nozzles are working properly. This option can be found in the Maintenance menu.
- Align the Printhead: If your prints appear misaligned or blurry, the printhead may need to be realigned. Access the Align Printhead tool in the Maintenance menu on the printer or use the Epson Utility software.
- Check Paper Type and Settings: Ensure that you’re using the correct paper type for your print job and that the Paper Type setting in the print dialog box matches the paper in the tray. For example, if you’re printing on photo paper, make sure the paper type is set to Photo Paper.
Pro Tip: Regularly clean the printheads if you notice a decline in print quality, especially after periods of printer inactivity.
4. Resolving Slow Printing Issues
If your Epson printer is taking too long to print, it could be due to high-resolution settings, network issues, or large print jobs.
How to Fix Slow Printing:
- Adjust Print Quality Settings:
- High-quality settings such as Best Photo or High Quality take longer to print because they use more ink and print at a higher resolution.
- For everyday documents, switch to Draft or Standard Mode in the print settings to speed up the process.
- Check the Network Connection:
- Wi-Fi Printers: A weak or congested Wi-Fi signal can slow down printing. Move the printer closer to the router or switch to a 2.4 GHz network if you're on a dual-band network.
- Wired Printers: Ensure the Ethernet cable is securely connected.
- Reduce Print Job Size: Large files with high-resolution images or graphics may slow down printing. Compress the file or reduce the resolution before printing to improve speed.
- Clear the Print Queue: Sometimes too many pending print jobs can cause delays. Clear the print queue by canceling unnecessary or stalled print jobs.
Pro Tip: If your printer consistently prints slowly, try updating the firmware to ensure it’s optimized for performance.
5. Fixing Ink Cartridge Recognition Issues
Sometimes, an Epson printer may not recognize the ink cartridge, even if it is newly installed. This can occur due to improper installation, dirty contacts, or third-party cartridges.
How to Fix Ink Cartridge Recognition Issues:
- Reinstall the Cartridge: Turn off the printer, remove the ink cartridge, and reinstall it, making sure it clicks into place properly.
- Clean the Cartridge Contacts: Use a lint-free cloth to gently clean the gold-colored contacts on the cartridge and inside the cartridge slot. Dirt or debris can interfere with the cartridge's connection.
- Use Genuine Epson Cartridges: Non-genuine or refilled cartridges may not be recognized by the printer. If you're using third-party cartridges, try replacing them with genuine Epson cartridges.
- Reset the Printer: Turn off the printer, unplug it from the power source, wait for a minute, and plug it back in. Turn it on again to see if the cartridge is now recognized.
- Update Printer Firmware: Go to the Epson Support website and check if a firmware update is available for your printer. Updating the firmware can resolve compatibility issues with newer cartridges.
Pro Tip: Always keep a spare set of genuine Epson ink cartridges on hand to ensure smooth operation and avoid compatibility issues.
Conclusion: Troubleshooting Your Epson Printer
Epson printers are built for reliability and high-quality performance, but like any device, they may encounter occasional issues. Whether you're dealing with paper jams, slow printing, poor print quality, or connectivity issues, following these troubleshooting steps will help you resolve the most common problems quickly.
By performing regular maintenance such as cleaning the printheads, aligning the printhead, and ensuring your drivers are up to date, you can prevent many of these issues from occurring in the first place. If any of the solutions in this guide don’t work, refer to your printer’s manual or contact Epson support for further assistance.
Happy printing!
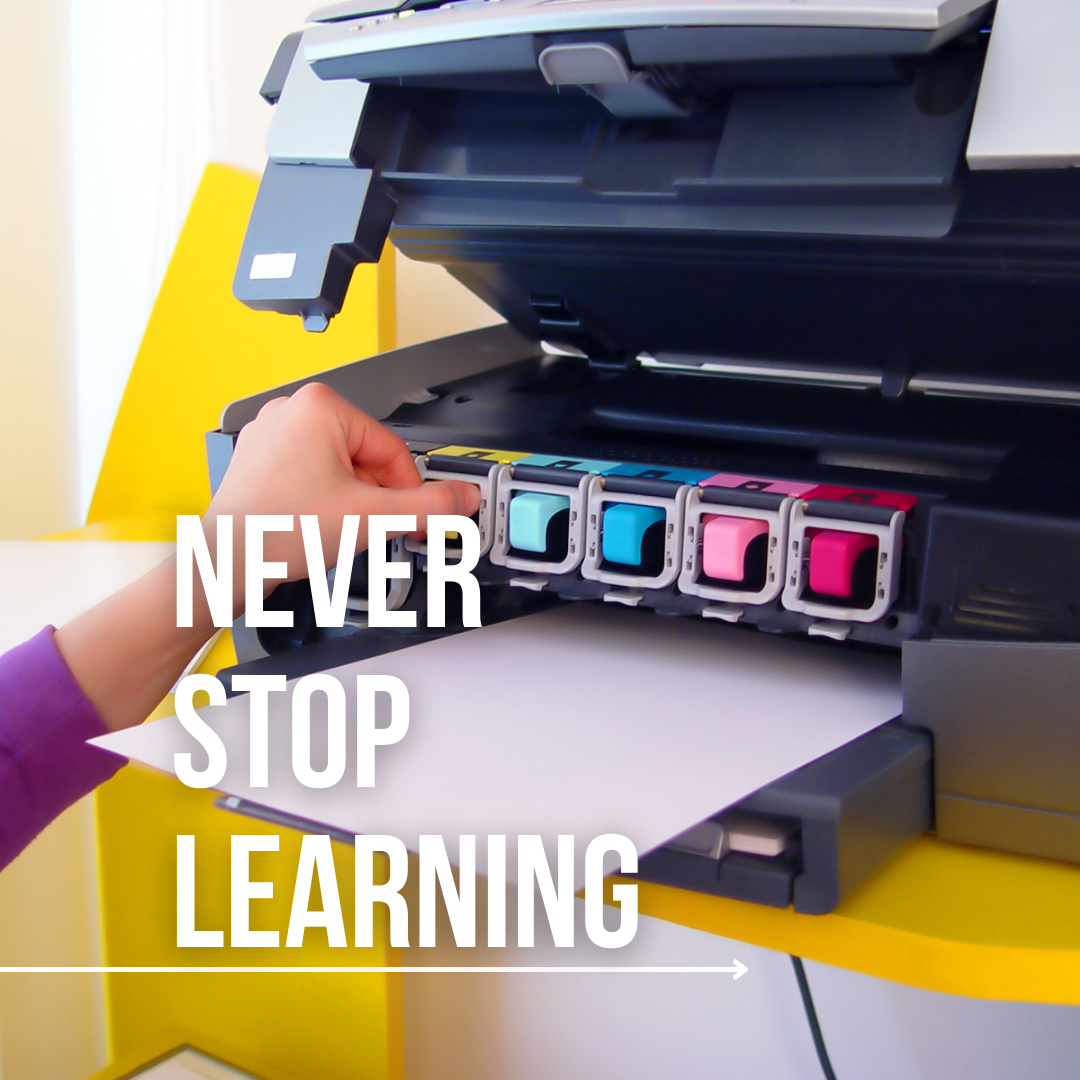
How to Replace Ink Cartridges in Epson Printers
Replacing ink cartridges in your Epson printer is a simple process that ensures your printer continues to produce high-quality prints. Whether you own an Epson EcoTank, WorkForce, Expression, or SureColor model, this guide will walk you through the process of safely removing the old cartridges and installing new ones.
Let’s take a look at the step-by-step process for replacing ink cartridges in your Epson printer, including some helpful tips on choosing the right cartridges and troubleshooting potential issues.
Step 1: Determine When to Replace Ink Cartridges
Before replacing ink cartridges, it's important to verify that they need to be replaced. Epson printers provide several ways to check ink levels:
- Printer Control Panel: Many Epson printers display ink levels on their LCD screens, showing you when one or more cartridges are running low or need replacement.
- Epson Status Monitor: If you're printing from a computer, the Epson Status Monitor will alert you when ink levels are low. You can access this tool via the printer driver or the Epson software installed on your computer.
- Epson iPrint App: If you’re using the Epson iPrint App on a smartphone or tablet, you can also check ink levels and receive notifications when it's time to replace the cartridges.
Once you've confirmed that the ink cartridges need replacing, you're ready to begin the process.
Step 2: Prepare the New Ink Cartridges
Before replacing the old ink cartridges, make sure you have the correct replacements for your Epson printer model. Here’s how to choose the right cartridges:
- Check the Printer Manual: Your printer manual or the inside of the ink cartridge compartment will list the compatible cartridges for your specific model.
- Epson’s Compatibility Tool: Visit the Epson Support website and enter your printer model to find the right ink cartridges for your device.
- Use Genuine Epson Ink: For the best print quality and performance, it’s recommended to use genuine Epson ink cartridges. Third-party or refilled cartridges may cause print quality issues or damage the printer over time.
Pro Tip: Always keep spare ink cartridges on hand to avoid any disruptions when the ink runs out unexpectedly.
Step 3: Access the Ink Cartridge Compartment
Follow these steps to access the ink cartridge compartment and begin the replacement process:
- Turn on the Printer: Ensure that your printer is powered on before starting the ink replacement process. The printer needs to be on for the cartridge carriage to move into position.
- Open the Printer’s Cover: Lift the printer’s cover or ink cartridge access door to reveal the ink cartridges. Depending on the model, this may be located on the front, top, or inside the printer.
- Wait for the Cartridge Carriage to Stop Moving: Once the cover is opened, the ink cartridge carriage will automatically move into a position where the cartridges can be accessed. Wait for the carriage to stop moving before proceeding.
Step 4: Remove the Old Ink Cartridge
Once the ink cartridge carriage is in position, you can remove the old ink cartridge:
- Press the Release Tab: Each ink cartridge will have a small release tab that you’ll need to press to unlock it from its slot. Gently press the tab and pull the cartridge out of the slot.
- Dispose of the Old Cartridge Properly: Once the cartridge is removed, dispose of it according to local recycling guidelines. Many communities offer recycling programs for printer cartridges to reduce environmental impact.
Pro Tip: Avoid touching the chip or the ink nozzles on the old cartridge to prevent ink smudges and printer issues.
Step 5: Install the New Ink Cartridge
Now that the old cartridge is removed, it’s time to install the new one:
- Unpack the New Ink Cartridge: Take the new ink cartridge out of its packaging. Be sure to remove any protective seals or plastic strips covering the ink nozzles or contacts.
- Insert the Cartridge into the Slot: Place the new cartridge into the corresponding color-coded slot. Each slot is marked with a specific color, so make sure you place the right cartridge in the correct position.
- Press the Cartridge Down Until It Clicks: Gently press the cartridge into the slot until it clicks into place. This ensures that the cartridge is securely installed and ready for use.
Step 6: Close the Printer and Align the Cartridges
Once the new cartridge is installed, complete the process by following these final steps:
- Close the Printer Cover: After installing the new cartridges, close the ink cartridge compartment cover or the printer’s lid. The printer will recognize the new cartridges and prepare for printing.
- Align the Printhead: In some cases, the printer may prompt you to align the printhead after replacing the ink cartridges. This ensures that the new cartridges are properly calibrated for optimal print quality. You can also manually start this process by selecting Maintenance on the control panel and choosing Align Printhead.
- Print a Test Page: To ensure the cartridges are working correctly, print a test page. This will confirm that the ink is flowing properly and that the colors are aligned.
Step 7: Troubleshooting Cartridge Installation Issues
Occasionally, you may encounter issues during the cartridge replacement process. Here are some common problems and their solutions:
1. Cartridge Not Recognized:
- Solution: If the printer doesn’t recognize the new cartridge, remove it and reinstall it, ensuring that it clicks into place. If the issue persists, try cleaning the cartridge’s contacts with a lint-free cloth. Always make sure you are using genuine Epson ink cartridges.
2. Poor Print Quality After Replacement:
- Solution: Run a Printhead Cleaning Cycle using the printer’s control panel or Epson software. This will clear any clogs in the printhead and ensure smooth ink flow. You can also run a Nozzle Check to verify that the ink is distributed evenly.
3. Ink Leaks or Cartridge Damage:
- Solution: If you notice ink leaking from the cartridge or the cartridge appears damaged, remove it immediately and replace it with a new one. Avoid using damaged cartridges as they can cause significant print quality issues and damage the printer.
Pro Tip: Keep your printer firmware up to date by checking for updates on the Epson Support website. Firmware updates can resolve compatibility issues with newer ink cartridges.
Conclusion: Keep Your Epson Printer Running Smoothly
Replacing ink cartridges in your Epson printer is a straightforward process that helps maintain high-quality prints and smooth printer operation. By following these step-by-step instructions, you can quickly and easily swap out old cartridges for new ones, ensuring your printer is always ready to deliver clear, vibrant results.
Using genuine Epson ink cartridges, performing regular maintenance like cleaning the printheads, and troubleshooting any potential issues will help extend the life of your printer and keep your prints looking their best. Happy printing!
Epson Print Quality Optimization
Epson printers are known for their reliability and high-quality output, whether you’re printing documents, photos, or graphics. However, to consistently achieve the best possible print quality, you’ll need to make some adjustments to the printer settings, use the right paper, and perform routine maintenance. Whether you’re using an Epson EcoTank, WorkForce, Expression, or SureColor model, optimizing your printer can enhance print clarity, color accuracy, and overall performance.
This guide will walk you through the essential steps to optimize print quality on your Epson printer, troubleshoot common print issues, and ensure that your prints come out perfect every time.
1. Adjusting Print Settings for Optimal Quality
The quality of your prints can often be improved simply by tweaking the printer settings to match the specific type of document or image you're printing. Epson printers allow you to control print resolution, color balance, and other factors that can significantly affect output.
Choosing the Right Print Mode:
- Draft Mode: Best for quick, everyday printing of non-critical documents. It uses less ink and prints faster but results in lower quality.
- Standard Mode: The default setting, providing a balance between print speed and quality, suitable for general documents.
- High-Quality Mode: This setting is ideal for high-resolution images, presentations, or photos, as it uses more ink to deliver sharper, more detailed prints.
How to Adjust Print Settings:
- On Windows: Go to Control Panel > Devices and Printers. Right-click your Epson printer, choose Printing Preferences, and select the appropriate print quality mode.
- On macOS: Open the Print Dialog Box by selecting File > Print in the application. Click Show Details and adjust the print quality under Media & Quality.
Pro Tip: Always select High-Quality Mode for photos and images to ensure vivid colors and sharp details. For text-heavy documents, Standard Mode should suffice.
2. Choosing the Right Paper for Your Print Jobs
The type of paper you use can have a significant impact on the final print quality. Epson printers are designed to work with various types of paper, and using the correct one can make a noticeable difference in the outcome of your print jobs.
Standard Printer Paper:
- Best For: Everyday printing of text documents, drafts, and internal reports.
- Recommendation: Use Epson Bright White Paper or any standard 20-24 lb paper for general printing needs.
Epson Photo Paper:
- Best For: High-quality photo prints, marketing materials, and presentations.
- Recommendation: Epson offers a range of photo papers, such as Epson Premium Glossy Photo Paper or Epson Ultra Premium Matte Paper, that are optimized for inkjet printing and produce vibrant, detailed images.
Specialty Papers:
- Best For: Professional photography, fine art prints, or high-resolution graphics.
- Recommendation: For professional prints, use Epson Premium Presentation Paper Matte or Epson Fine Art Paper for enhanced color depth and fine detail.
How to Select the Correct Paper Type in Settings:
- When loading paper into your Epson printer, ensure that the Paper Type setting in the print dialog box matches the type of paper you’re using (e.g., plain paper, glossy photo paper).
- In the Media Type section of the print settings, choose the specific paper type to ensure proper ink application and drying time.
Pro Tip: Storing your paper in a cool, dry place helps prevent humidity from affecting print quality. Damp paper can lead to poor ink absorption and distorted prints.
3. Maintaining Your Epson Printer for Consistent Quality
Routine maintenance is key to ensuring that your Epson printer continues to deliver excellent print quality. Over time, printheads can become clogged, and calibration may drift, which can affect output. Performing regular maintenance will prevent these issues from impacting your prints.
Cleaning the Printheads:
If you notice streaks, missing colors, or faded prints, the printhead may be clogged. Running a printhead cleaning cycle can often resolve these issues.
- Accessing the Cleaning Tool:
- On the printer’s control panel, go to Settings > Maintenance > Head Cleaning.
- You can also use the Epson Utility software on your computer to initiate a printhead cleaning cycle.
- Manual Cleaning:
- If automated cleaning doesn’t resolve the problem, you may need to manually clean the printhead. Remove the printhead following the instructions in the user manual, and gently wipe the nozzles with a lint-free cloth dampened with distilled water.
Aligning the Printheads:
Misaligned prints can cause blurry text or uneven images. Aligning the printheads ensures that colors and text are positioned correctly.
- Run the Printhead Alignment Tool:
- Use the printer’s control panel or the Epson Utility software to access the Align Printhead function and follow the instructions.
- After alignment, print a test page to ensure the issue is resolved.
Calibrating Color Settings:
If your prints are coming out with color discrepancies or poor color accuracy, calibrating your printer’s color settings can improve the results.
- Access Color Calibration:
- On the printer’s control panel, navigate to Settings > Maintenance > Color Calibration.
- Run a test pattern to ensure that colors are printing correctly and adjust as needed.
Pro Tip: Perform regular maintenance like printhead cleaning and alignment at least once a month or whenever you notice a decline in print quality, especially if your printer sits unused for long periods.
4. Troubleshooting Common Print Quality Issues
Even with regular maintenance and the correct settings, print quality issues can still occur. Here are some common problems and how to resolve them:
Faded or Light Prints:
- Cause: Low ink levels, incorrect print settings, or using the wrong paper.
- Solution: Check the ink levels using the printer’s display or the Epson Utility software, and replace cartridges if necessary. Ensure you are using the correct Print Mode for your document type.
Streaks or Missing Colors:
- Cause: Clogged printheads or misaligned nozzles.
- Solution: Run a Head Cleaning cycle followed by a Nozzle Check. If the issue persists, manually clean the printhead.
Blurry or Misaligned Prints:
- Cause: Misaligned printheads or paper misfeeds.
- Solution: Run the Printhead Alignment tool to realign the printheads. Ensure that the paper is loaded correctly and that the paper guides are snug against the paper stack.
Smudged or Wet Ink:
- Cause: Incorrect paper type or print settings.
- Solution: Make sure you’re using the correct paper type for your print job, and ensure that the Paper Type setting in the printer settings matches the paper you’re using.
Pro Tip: Keep your printer firmware updated to avoid any software glitches that may affect print quality. Visit the Epson Support website regularly to check for updates.
5. Using Genuine Epson Ink for Best Results
Using genuine Epson ink cartridges is critical for maintaining high-quality prints. Non-genuine or refilled cartridges can cause problems like clogged printheads, poor color accuracy, and overall reduced print performance.
Benefits of Using Genuine Epson Ink:
- Consistent Color Quality: Epson inks are formulated specifically for Epson printers, ensuring consistent color reproduction and print sharpness.
- Longevity: Genuine Epson ink provides long-lasting prints with excellent resistance to fading, especially when used with Epson paper.
- Prevents Damage: Third-party or refilled cartridges may cause clogs and leaks, leading to printhead damage and poor print quality over time.
Pro Tip: For regular printing, consider signing up for Epson’s Ink Subscription Program, which automatically sends you new ink cartridges when your printer detects low ink levels.
Conclusion: Achieving the Best Print Quality with Your Epson Printer
Optimizing your Epson printer for top-quality prints requires a combination of adjusting settings, using the right paper, performing regular maintenance, and troubleshooting issues when they arise. Whether you’re printing business documents, creative projects, or high-resolution photos, these tips will help you get the most out of your Epson printer.
By using genuine Epson ink and performing routine maintenance like cleaning the printheads and aligning the printhead, you can ensure that your Epson printer continues to deliver excellent prints for years to come.